Quick answer
Travel motor maintenance really starts with the final-drive gear oil, not with the hydraulic motor inside. Change the reduction-gear oil on schedule, read the drained oil, keep the floating face seal at the hub from leaking, and set track tension right — these six routine jobs decide whether the planetary set lives long or dies early.
Travel motor maintenance really starts with the final-drive gear oil, not with the hydraulic motor tucked inside it. Change the reduction-gear oil on schedule, read the drained oil closely, keep the floating face seal at the hub from leaking, and set track tension right — these six routine jobs decide whether the planetary set lives long or dies early. Done steadily, the cost is a few litres of oil; neglected, the bill jumps to the whole final drive.
This guide goes straight to the part of the travel system that fails most and is easiest to look after: the reduction gearbox (gear oil), the face seal, the bearings, and the parking brake. It is one link in the excavator maintenance set, and it complements the theory in excavator travel motor — that piece explains how the motor works, this one is about keeping it running.
Why the final drive fails before the hydraulic motor
The hydraulic motor is only half the story. Torque from the motor passes through the planetary reduction set — sitting in a gear-oil bath — before it reaches the sprocket that pulls the track. That reduction set takes the heaviest, dirtiest duty: it hangs outside, close to the ground, soaked in mud and water, turning constantly under the full weight of the machine.
The failure path is almost always the same. Dirty or low gear oil thins the film between the tooth faces. Teeth and bearings start shaving metal into the oil. That metal then grinds on like a liquid sandpaper, generating heat, thinning the oil, thinning the film further — a loop that feeds itself. Once the face seal at the hub leaks and water gets in and emulsifies the oil, the destruction speeds up sharply. So most of the maintenance work is about keeping the oil clean, full, and sealed, not about splitting the motor open.
What does travel-motor maintenance involve?
Travel-motor maintenance involves the six routine jobs below, ordered by priority and by how often they come up in practice. The first four use eyes, ears, and hands, with no big teardown. The last two need tools and a little discipline about tension.
- Change the reduction-gearbox gear oil on schedule.
- Read the drained oil: metal glitter, milky oil, burnt smell.
- Check the face seal at the hub for leaks.
- Listen for bearing rumble as the machine travels.
- Test the parking brake for drag.
- Set track tension right so the motor is not overloaded.
Job 1 — Change the reduction-gearbox gear oil
Gear oil lubricates the planetary gears and is completely separate from the hydraulic oil that runs the motor. The two must never mix. Each travel side has its own reduction drive, so both must be changed — the awkward side is the one people forget.
How to drain and refill the gear oil correctly
Before draining, run the machine for a few minutes so the oil is warm and thin and the debris stays suspended and flows out rather than settling on the bottom. Rotate the final drive so the drain hole sits at the lowest point, open the top fill hole first to vent, then open the drain. Catch the oil in a clean tray so you can still read it — this is the most important step, do not pour it straight onto the ground.
Refill with the correct type and amount, checking the level port if the drive has one, and avoid overfilling because oil expands when hot and can push against the seal. Tighten the drain plug with a good gasket; if the gasket is glazed or crushed, replace it, because a drain-plug leak is the quiet kind that gets missed.
Choosing the oil grade for the reduction gearbox
Use the gear oil grade the manufacturer specifies for the final drive, not hydraulic or engine oil poured in for convenience. The maker's technical data, for example looked up by model on Komatsu, gives the type and viscosity suited to the load and operating temperature. In a hot, humid climate the oil has to hold its film once the final drive heats up after long, continuous running.
Job 2 — What the drained oil tells you about the final drive
The drained oil is the cheapest X-ray you have. Do not throw it out before looking closely under light, smelling it, and dragging a magnet across the bottom of the tray.
Metal glitter in the oil
A little fine metallic sheen in the oil is normal on a run-in gear set — tooth faces always wear slightly. The concern is when the amount climbs between changes, or when flakes the size of a pin head or larger appear. Fine, smooth glitter usually points to bearing or tooth-face wear; large, sharp fragments signal chipped teeth or surface spalling. A magnet separates the ferrous debris; glitter that will not stick to the magnet may be bronze from the bearing cage — also a bad sign.
Milky oil means water is present
Oil that turns milky brown or cloudy grey is almost certainly water that has entered and emulsified with the oil. Water gets in through a failed face seal, through the breather when wading deep, or after a high-pressure wash aimed straight at the hub. Emulsified oil loses its ability to form a film, and bearings and teeth start to pit. When you see cloudy oil, do not stop at an oil change — find the water path, replace the face seal, flush the drive clean, then refill with fresh oil.
Burnt smell and dark oil
A burnt smell and thick, dark, sticky oil point to overheating. The common causes are low oil, a dragging parking brake generating friction heat continuously, or an overload from wrongly tensioned track. Overheated oil oxidises, thickens, forms sludge, and loses its lubricity. In this case, deal with the heat source before you blame the oil.
Job 3 — Check the face seal at the hub
The face seal, or floating seal, is a pair of metal rings pressed together across a thin oil film, each ring backed by an elastomer O-ring that squeezes them. It is the boundary that keeps gear oil in and mud and water out. This is the number-one leak point of the final drive.
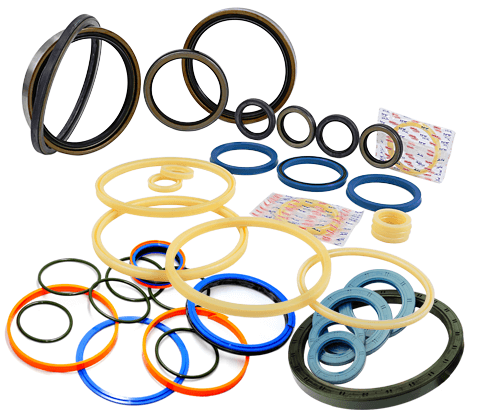
Check by eye: look for oil weeping around the hub, mud caked into an oily damp band at the edge, or an unusually fast drop in level between changes. Run a hand around the hub joint; warm, fresh leakage will coat your fingers. A face seal usually wears when sand and grit work in between the two rings and score the faces, or when the O-rings harden and no longer press enough. When you replace it, always replace the pair and the O-ring set, clean the groove, lubricate correctly, and press it home square — even a slightly cocked install leaks again. Quality seals from specialists such as PET Seals hold their squeeze and resist wear better than no-name parts, and are worth using at exactly this spot.
Job 4 — Listen for bearing rumble while travelling
The ear is a good diagnostic tool for bearings. Let the machine crawl on flat ground, cut the extra noise, and listen to each side. A healthy final-drive bearing runs smooth and even. A rumble, a low hum, or a gritty grinding that tracks the rotation means the bearing is starting to pit or is short of lubrication.
The mechanism: when the oil is dirty or emulsified with water, rollers and races pit at the surface, and each pass over a pit throws off noise and vibration. Left alone, clearance grows, the sprocket shaft develops play, load shifts unevenly onto teeth and seal, and the whole drive follows it down. A strange noise should be cross-checked against the drained oil right away — a rumble plus rising metal content is a clear signal to plan a teardown. Fold this listening into the daily excavator checks so it is caught early.
Job 5 — Test the parking brake for drag
The travel motor has a friction-disc parking brake released by oil pressure: with pressure, the brake releases so the machine moves; with no pressure, springs clamp the discs and hold the machine still on a slope. If the brake drags — never fully releasing — the friction discs rub constantly, generating heat inside the drive and overheating the gear oil, exactly the burnt smell from Job 2.
A simple test on a gentle slope: stop the machine, return to neutral, and see whether it creeps — creeping means the brake holds poorly. The other way round, if the final drive runs unusually hot while travelling and the oil darkens fast, suspect a brake that will not fully release. Both directions call for checking the brake-release pressure and the disc condition. This job is easy to skip because the parking brake hides inside the motor, but it is a quiet heat source that destroys gear oil.
Job 6 — Set track tension so the motor is not overloaded
Over-tight track is a direct enemy of the travel motor. When the track is too tight, the motor has to make more torque to overcome the extra tension, system pressure rises, heat rises, and the final-drive bearings and seals carry a continuous side load. Track that is too loose whips, derails, and slams into the idler and sprocket, doing harm a different way.
Set the track to the sag the manufacturer specifies for the model and the ground type; sticky mud needs a different setting from rock. Check it on the top run of track between sprocket and rollers, after rolling the machine back and forth a few metres so the track settles naturally. Adjust with the grease-filled track adjuster, adding grease to tighten and bleeding grease to loosen. Holding the right tension is the cheapest way to unload the motor and extend the life of the whole undercarriage drive — see undercarriage parts for track, rollers, and sprockets.
A table for reading the drained oil
The table below gathers the common gear-oil signs and the matching response, to use as a quick reference while you stand over the tray you just drained.
| Drained-oil sign | Root cause | What to do |
|---|---|---|
| Oil still clear and clean | Normal | Change on schedule, keep watching |
| Fine sheen, small amount | Normal surface wear | Note it, compare next change |
| Fine glitter climbing | Bearing or tooth-face wear | Shorten inspection cycle, check the magnet |
| Large, sharp flakes | Chipped teeth or spalling | Stop, open and inspect the planetary set |
| Milky oil | Water past the face seal | Replace seal, flush, refill fresh |
| Burnt smell, dark sticky oil | Overheat, low oil, dragging brake | Fix the heat source first, then change oil |
| Level dropping fast | Face seal or hub gasket leak | Find the leak, replace seal and gasket |
When an oil change is enough, and when to open a rebuild
The line sits in what the drained oil shows. Clear oil, glitter at baseline, a brake that holds, and no strange noise mean the work stops at an oil change and a seal check. Once you see large metal flakes, a bearing rumble with vibration, or emulsified oil that returns even after a seal change, the final drive is damaged inside and needs opening.
A rebuild means removing the reduction drive, inspecting each planetary gear, the shaft, the bearings, and the brake faces, measuring clearances, and replacing whatever has drifted out of tolerance. Early diagnosis decides the cost: catch it at the first hint and you replace bearings and a seal; leave it late and a broken tooth takes the housing with it.
Where JIC parts and ZVL bearings fit in a rebuild
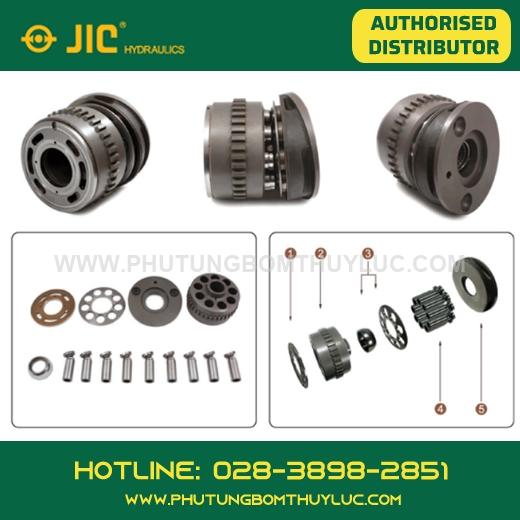
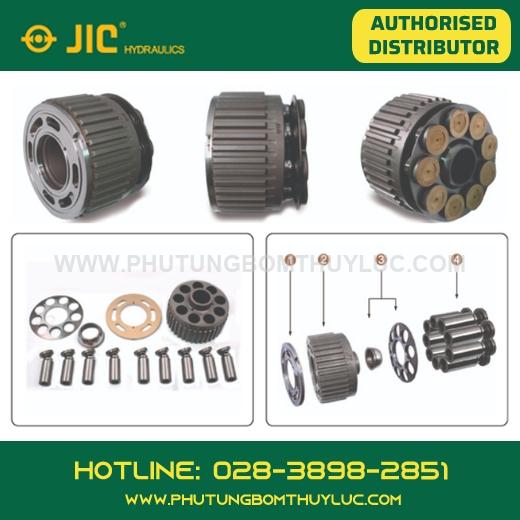
Once you have to open the drive, the quality of the replacement parts decides how long this rebuild lasts. JIC Hydraulics travel motor parts are the first thing we put on the bench: the piston set, valve plate, brake springs, and seal kit are made to replace the original codes and tolerances, with material and surface finish suited to continuous load in a hot climate. Fitting the right set from the start avoids reopening the drive soon after over one sub-standard detail. Look up by model and drive code on jic.com.vn to match the right set.
The bearing is the part that carries the most load and makes the most heat in the drive, so this is the place not to skimp. ZVL Slovakia bearings for the final drive hold their clearance and roundness under heavy load and run smoother and longer than cheap parts of unknown origin. Pairing ZVL bearings with a PET Seals seal kit and JIC parts makes for a rebuild you can trust. See the travel motor catalogue to choose by motor family such as K3V, K5V, HPV, or the Kayaba MAG line your machine runs.
Common mistakes when maintaining the final drive
The most common mistake is dumping the drained oil without reading it — losing the cheapest early warning there is. Next is forgetting one travel side, or refilling the reduction gearbox with hydraulic oil by mistake. Many operators pressure-wash straight at the hub, driving water past a still-good face seal and creating emulsified oil at the next change.
Another group of mistakes comes from track tension: setting it by feel, not rolling the machine to its natural position before measuring, or leaving the track rock-hard on the belief that tight is safe. Last is ignoring strange noise and a burnt smell as just an old-machine thing, until the drive seizes in the middle of a job. The habit of caring for the undercarriage should run in step with excavator bucket maintenance and cleaning the hydraulic oil cooler so the whole machine stays within a controlled heat range.
A suggested schedule by signs, not by fixed numbers
The gear-oil change interval should follow the manufacturer recommendation for the model, and tighten when conditions get harsher: frequent wading, work in mud and sand, or continuous heavy load all call for a shorter cycle and closer oil checks. Instead of chasing one single hour figure for every machine, let the drained oil and the machine's own sound tune the schedule: oil starting to dirty faster, a bearing rumble getting clearer — that is when to shorten the gap between changes.
Record each time: oil colour, amount of debris, water or no water, seal condition, and track tension. A few logged changes give you a trend line — and the trend, not a single reading, is what warns of failure ahead so you can order parts before the machine goes down.
Key takeaways
- Travel motor maintenance starts with the final-drive gear oil, not the hydraulic motor.
- Do not dump the drained oil before reading it: metal glitter, milky oil, and a burnt smell are early warnings.
- Milky oil means water past the face seal; replace the seal and flush before refilling.
- Listen for bearing rumble and test parking-brake drag to catch the heat that destroys gear oil.
- Set track sag correctly so the motor is not overloaded and the drive lasts longer.
- For a rebuild, pair JIC parts with ZVL bearings and PET Seals for a job you can trust.
Written by
Lê Minh Tuấn
Lê Minh Tuấn handles scheduled maintenance and machine longevity at Việt Trung Hải. He writes about oil, filters, service intervals and the habits that keep machines running reliably.
Related parts
The exact parts discussed above — send your machine model or pump code to match.