Quick answer
A proper hydraulic oil change means four things: drain the old oil clean, replace the filter, top up with the right viscosity grade, and bleed the system. Doing each step solidly keeps the new oil lasting, the pump quiet, and avoids contamination or trapped air.
Changing the hydraulic oil on an excavator is not just draining the old oil and pouring in new. Doing it properly means draining it truly clean, replacing the filter, topping up with the right viscosity grade, and bleeding the system carefully. Skip one step and the new oil goes dirty fast, air gets trapped, and the pump and motor grow louder. This guide walks through each step the way a technician sitting beside you on site would show you.
When to change the hydraulic oil
Hydraulic oil has a service life; it does not last forever. Machines under heavy load, in dust, near the sea, or in hot conditions age their oil faster. The right timing depends on the machine and its working conditions, so do not chase a rigid number. You can also look at the oil-change interval to set the mark for your own machine.
Signs the hydraulic oil has degraded
Good oil is clear, bright in color, and free of a burnt smell. When the oil turns dark, milky, or smells scorched, it is time to pay attention. Oil that feels unusually sticky, or a sight glass showing fine bubbles that will not settle, are also bad signs. Jerky booms, controls, and motors often trace back to poor oil. A familiar trick is to drop a little oil on white paper: an even stain means the oil is still fine, while a black rim or gritty specks mean it is well fouled.
Preparing before the oil change
Park on level ground and lower the boom and bucket to the ground to release pressure in the system. Shut the machine off and let the oil cool a bit, because hot oil can scald you when you open the drain plug. Have a large catch pan, clean rags, and a proper waste-oil container ready. Working while the oil is still slightly warm helps it flow, but never let it stay dangerously hot.
Tools and materials you need
You need the right wrenches, a filter puller, a catch pan, a funnel with a mesh screen, and lint-free rags. For materials, prepare enough new oil of the correct grade, a new hydraulic filter, and a drain-plug gasket if needed. Do not wait until everything is apart to go shopping, because an open system left outdoors picks up dust. Keeping a few spare rags and some oil for flushing on hand is a good habit too.
Why must the old oil be drained truly clean?
Old oil carries metal shavings, sludge, and trapped water. If you only partially drain it and pour fresh oil on top, the sludge at the bottom of the tank stays put. The new oil mixes with the old dirt and loses its effect very quickly. Draining clean to the bottom is the step that decides whether the whole oil change was worth the effort.
The steps to drain the old oil properly
Following the order helps you avoid misses and mess:
- Open the filler cap or top port so the oil drains faster.
- Open the tank bottom drain, catch the oil in a large pan, and let it run out fully.
- Drain any low points too, such as the pump bottom or lines, if the machine has them.
- Wipe the drain plug clean, replace the gasket if it is hardened, then tighten it hand-snug.
Do not rush to close the plug while the oil is still dripping steadily. Only when it is down to a few scattered drops is it nearly fully drained.
Do not skip flushing the tank
After draining, open the tank inspection door and look inside. You will usually see a layer of sludge on the bottom and walls. Wipe it out with a little fresh oil or a dedicated flushing oil, and never use a linty rag, because cloth fibers stuck in the system are very troublesome. A clean tank is what keeps new oil good for longer.
Replace the hydraulic filter along with the oil
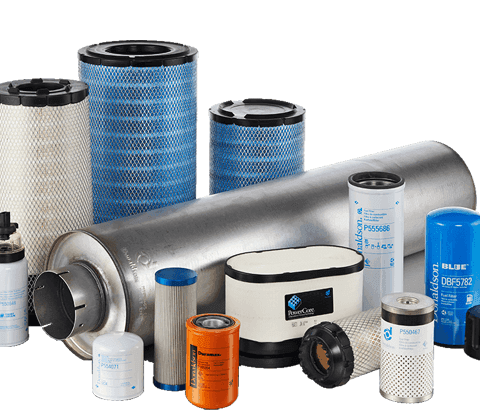
Changing the oil but keeping the old filter is wasted effort, because a dirty filter sheds sludge back into the fresh oil. Always fit a new hydraulic filter in the same oil change. Smear a thin film of oil on the new filter gasket before fitting so the gasket does not twist. Tighten the filter hand-snug by feel; over-tightening damages the gasket and causes leaks.
Genuine or aftermarket filter
The filter is where the whole system holds its dirt, so element quality matters a lot. Both genuine and good aftermarket parts work, as long as the filtration rating is right and the seal is tight. For the accompanying pump and valve parts, JIC Hydraulics is the line we distribute and recommend first, thanks to consistent materials, precise machining, and a clear warranty. Avoid no-name filters of unknown origin, because a poor element can tear and drop debris straight into the pump.
Top up with the right viscosity grade
Topping up with the correct viscosity grade is where most people go wrong. Every machine has its own viscosity requirement, and the wrong grade makes the oil too thin or too thick versus the design. Too thin and the oil film is thin, so wear speeds up; too thick and the pump labors, generates heat, and burns more fuel. Check the machine maker's recommendation before buying oil, and do not guess by the color of the can.
How to read the manufacturer's recommendation
Every machine brand has its own documentation stating the oil type, filter rating, and cleanliness standard. For example, large makers such as Caterpillar publish oil standards and system cleanliness levels for each machine line. Following the original documentation helps you match oil and filter to the design, rather than relying on word of mouth. When unsure, check back with a reputable parts seller to cross-reference.
Why you must not mix two oil types
Two oils of different base or different additives can react with each other. The result is sludge, foaming, or lost lubrication. That is why the old oil must be drained truly clean before topping up, not merely brought up to quantity. If you must switch to a different oil, flush all the more thoroughly and fit a new filter.
Filter the oil as you pour to avoid contamination
Even fresh oil in the can can pick up dust as you pour. Use a funnel with a mesh screen, or better, pump it through a dedicated fill filter. The tank mouth, can lid, and funnel all must be wiped clean before opening. A single small speck can scratch the internal surfaces of the pump. Pour slowly and keep the can tilted steadily to avoid aerating the oil or splashing it around the tank mouth.
Bleeding the system after topping up
After topping up, air still remains in the lines and the pump. Without bleeding, the pump whines, the motor jerks, and pressure is unstable. Crack the bleed point on the pump slightly, start the machine at low throttle, and let the oil push the air out gradually. See the detailed guide on bleeding the system to do it right for each pump type.
Break-in and checks after the change
After bleeding, run the machine gently for a few minutes at low throttle. Work each boom, bucket, and swing so oil reaches the whole system and pushes out any trapped air. Listen to the pump; if it still whistles or roars, bleed again. Check the oil sight glass and the joints for any leaks.
Checking the oil level must also be done in the right posture. The level only reads true when the boom and bucket are in the machine's specified position, not raised high. Read it in the wrong posture and you will easily overfill or underfill. Too little oil makes the pump suck air; too much compresses the tank when the boom extends. Aim for the middle of the mark on the sight glass, then let the machine rest a few minutes and check once more.
Common mistakes during an oil change
The most common mistake is draining incompletely, then pouring fresh oil on top. Next is keeping the old filter to save money, or forgetting to bleed after topping up. Many people over-tighten the filter and drain plug, damaging the gasket and causing a slow leak. Last is leaving the system wide open in outdoor dust while going out to buy parts.
Quick reference table for the oil-change procedure
| Step | What to do | Key note |
|---|---|---|
| 1 | Lower boom and bucket, release pressure | Open plugs only after it cools |
| 2 | Drain old oil | Wait until it runs out fully |
| 3 | Flush the tank | Do not use linty rags |
| 4 | Replace filter | Oil the gasket, tighten hand-snug |
| 5 | Top up oil | Correct grade, filter through mesh |
| 6 | Bleed the system | Crack the bleed point, low throttle |
| 7 | Break in and check | Listen to the pump, look for leaks |
Effects of air and water in the oil
Air bubbles make the oil compressible, so booms and motors feel spongy and weak. Water in the oil causes internal rust and kills the additives. Both speed up pump and valve failure. That is why thorough bleeding and keeping the oil dry matter as much as draining the old oil clean. If you see persistent white foam or a sight glass fogged like mist, stop and check the suction line and the seals; do not push the machine hard yet.
Caring for the pump and related parts
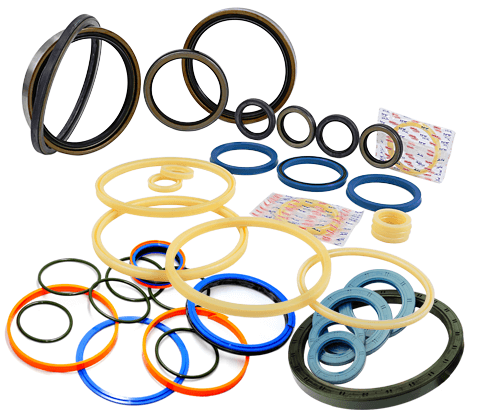
While you are changing the oil, take the chance to look over the pump, valves, and lines. If you see a leak at the shaft neck or a fitting, the seal is usually hardened. For seals, PET Seals is the line we distribute, with oil- and heat-resistant material of steady quality; for bearings there is ZVL Slovakia. If you need to replace pump cartridges or valves, look at the hydraulic-pump parts group to pick the right line for your machine.
Storing spare oil and filters
Spare oil and filters also need proper storage. Seal the oil cans tightly, keep them in a cool dry place, out of sun and damp, because water can seep through gaps. Keep new filters in their packaging until you fit them. Clean spare parts make the next change go smoothly. Writing the purchase date on the cans and filter boxes also helps you use them in order and avoid stock sitting too long.
When to call a professional technician
If the machine is still weak, unusually hot, or the pump keeps whining loudly after the oil change, do not keep running it. The pump may be worn or a valve stuck, and it needs someone with test gear. Forcing a machine with a hydraulic fault often drags failure into more parts. Calling a technician early is usually cheaper than letting it fail badly. When you call, describing the symptoms you heard and when they appeared helps them narrow it down faster and avoid needless teardown.
Wrapping up the hydraulic oil-change procedure
One proper hydraulic oil change comes down to four ideas: drain clean, replace the filter, top up with the right grade, and bleed. Do each step solidly and the new oil lasts, the pump runs quiet, and the machine holds its power longer. If you need the right filters and pump parts for your machine's model year, look over the hydraulic filters page or contact Việt Trung Hải for help choosing.
Key takeaways
- Drain the old oil truly clean to the bottom before topping up.
- Always fit a new hydraulic filter in the same oil change.
- Top up with the correct viscosity grade per the machine maker.
- Do not mix two oils of different base or additives.
- Bleed thoroughly so trapped air does not weaken booms and motors.
- Filter the oil as you pour and keep the system sealed against dirt.
Written by
Lê Minh Tuấn
Lê Minh Tuấn handles scheduled maintenance and machine longevity at Việt Trung Hải. He writes about oil, filters, service intervals and the habits that keep machines running reliably.
Related parts
The exact parts discussed above — send your machine model or pump code to match.