Quick answer
Replacing the center joint seal kit means reconditioning the swivel joint when an excavator crabs to one side, travels weakly, or leaks oil at the center. The job means removing the center joint, fitting the right seal kit for the model, cleaning the grooves, and torquing it back to spec. Done properly, the machine stops crabbing and holds steady travel pressure again.
Replacing the center joint seal kit is the job a hydraulic technician faces when an excavator starts crabbing to one side, travels weakly, or leaks oil right under the belly. The center swivel joint is where oil passes from the rotating upper structure down to both tracks while the machine slews, and the seals inside keep those oil circuits from mixing. Once the seals wear, oil crosses between layers, the machine loses travel power and pulls to one side. This guide walks from the symptoms, through telling faults apart, to the six steps to strip, reseal, and refit the center joint the right way, with tips on choosing seals and dodging the mistakes we see in the workshop.
What the center joint is and where it sits
The center swivel joint sits right at the middle of the slew ring, linking the upper structure oil lines to the two travel motors on the undercarriage. As the upper turns full circle, oil still has to reach the tracks without breaking or mixing circuits. The part that manages this is the center joint, a spindle fitted inside a body. The spindle carries several ring grooves, each one a separate oil circuit: left forward, left reverse, right forward, right reverse. Some machines add a two-speed line or a dozer-blade line. What separates those grooves is the center joint seal kit. Each seal holds one pressure layer and stops oil crossing from one layer to the next. Grasp this layout and you see why worn seals make the machine crab.
When do you need to replace the center joint seal kit?
Think about replacing the center joint seal kit when the machine shows one of the familiar signs. One track runs slower than the other. The machine drifts sideways even with both travel levers pushed evenly. Travel goes weak on a climb or through soft ground. Or oil weeps out under the belly, running down the joint spindle. Worn seals let oil cross layers inside the joint, so pressure never fully reaches the track motor. If digging, lifting, and slewing stay strong and only travel is weak and off, the fault most likely sits in the center joint, not the main pump. That is the point to pull the joint and inspect the seals.
Signs the center joint seals have failed
Before you strip anything, confirm the symptom so you do not open the wrong part. Failed center joint seals usually show up in a few ways:
- The machine pulls to one side and needs constant steering to run straight.
- One track is short on power and falls behind on a climb.
- Both tracks slow down together once the oil is hot.
- Oil weeps at the center, around the joint flange.
- On some machines the oil heats up fast because cross-leak turns pressure into heat.
Timing tells you a lot too. If the machine crabs from cold, the seals are clearly worn. If it only weakens when the oil is hot, the seal gaps open with heat and leak more.
Telling seal crabbing apart from other faults
Not every crab is a seal problem. There is a fast way to sort it on the yard:
- If only travel is weak and off while digging, lifting, and slewing stay strong, suspect the center joint first.
- If one track is fully dead, also check that side travel motor and valve.
- If every function is weak, the fault is usually the main pump or oil supply, not the center seals.
- If a track is mechanically locked, check bearings and track shoes before blaming hydraulics.
A simple test is to swap the two travel-motor oil lines and run it. If the weak side follows the oil line, the fault is upstream in the supply, which includes the center joint.
Tools and parts to prepare before the job
Good prep keeps the center joint seal job clean and quick. You want a torque wrench set, a puller, a soft mallet, a soft drift, clean hydraulic oil to lubricate on assembly, lint-free rags, and a tray to lay parts out in order. The key item is the right seal kit for the joint on your machine. This is the hydraulic seal parts set made for the center joint, holding several different seals to suit each groove. Have fresh oil and a filter ready if you plan to change them at the same time. Screen off the work area so dust and grit stay out of the joint, because a single grain of sand can score the spindle and cut a new seal.
What is inside a center joint seal kit
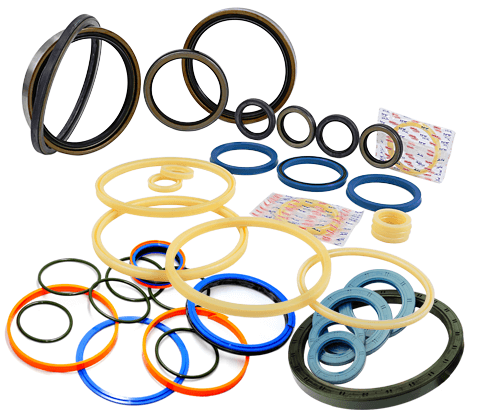
A center joint seal kit is not just one kind of ring. Depending on the joint, the kit usually holds:
- Main layer seals that block oil between the pressure grooves.
- Backup rings and secondary seals at both ends of the spindle.
- A flange gasket and an outer dust ring.
- Some joints also use a guide bush so the spindle turns smoothly.
Each piece has its own section and hardness, and only seats in the right groove. Seal material varies with the oil type and working temperature. A good aftermarket kit uses heat- and oil-resistant material suited to how the machine runs, so ask about the material grade when you buy.
6 steps to replace the center joint seal kit correctly
Here is the basic order the workshop follows:
- Lower the blade, lock the boom, shut down, and bleed residual pressure from the hydraulic system.
- Mark and disconnect the oil lines to the center joint, then cap the line ends to keep them clean.
- Remove the retaining flange and draw the spindle out of the body, keeping its orientation for refit.
- Strip all the old seals, clean the grooves, and inspect the spindle and body surfaces.
- Fit the new seal kit into the correct grooves, oil them lightly, and avoid twisting or tearing any seal.
- Slide the spindle back into the body, refit the flange, and torque to the maker spec for the model.
Every step needs to stay clean and gentle. Rushing the spindle in or out is the easiest way to cut a new seal.
Removing the center swivel joint safely
Pulling the center joint differs from pulling a cylinder seal, because the joint sits deep under the belly and links many oil lines. First bleed off all residual pressure, including any charge stored in an accumulator if the machine has one. Mark each oil line by position, because a swapped line makes the machine travel the wrong way. When drawing the spindle, pull it straight and do not rock it hard against the groove walls. If you already know how to replace cylinder seals, the same care about cleanliness and not scratching surfaces applies here. Set the spindle on a soft rest to avoid knocking the groove edges.
Inspecting the spindle and body before new seals
New seals only hold if the spindle and body surfaces are still good. After cleaning, look closely:
- Check the spindle for lengthwise scratches, pitting, or a worn ridge.
- Check the groove walls in the body for scoring, flaking, or corrosion.
- Look for metal fines lodged in the oil grooves, a sign of heavy wear.
If the spindle is only lightly worn, polish it and fit new seals. If it is deeply scored into a ridge, new seals will soon tear, so recondition or replace the spindle. Skipping this surface check is why many jobs crab again within days of new seals.
Matching the seal kit to the machine model
Center joint seals are not universal. The number of layers, spindle diameter, and groove sections change from model to model. Get one detail wrong and the whole kit will not seal. The safest path is to send the machine model or joint number to the supplier to cross-check.
| To cross-check | Why it matters |
|---|---|
| Model and joint number | Fixes the correct layer count and sizes |
| Spindle diameter | Picks the right seal inner diameter |
| Oil type and climate | Picks heat-resistant seal material |
| Number of oil lines | Whether a blade or two-speed line exists |
For loose seals outside the center joint, browse the hydraulic seals group to order the right type.
Fitting new seals without twisting or tearing
Fitting the seals decides how well it holds. Coat the seal and groove with clean oil first. Use your hands or a soft tool, never a metal screwdriver that tears the seal lip. For directional seals, face the sealing lip toward the pressure side. As you feed the spindle into the body, turn it gently and push straight so the seal does not fold. If it feels unusually tight, stop and check rather than forcing it in. A twisted or folded seal leaks the moment the machine sees pressure, and you have to strip it again.
Refitting the center joint and torquing correctly
Once the spindle is seated, refit the flange and start the bolts in a diagonal, crossing pattern. Tighten evenly in several passes so the flange pulls down square, not cocked. Torque must follow the maker spec for the model, not feel. Over-torque cracks the flange or crushes the gasket; under-torque weeps oil at the flange face. Reconnect the oil lines to the marks you made, with no lines swapped. Recheck every bolt and fitting before you start the machine.
Bleeding and test running after the job
Once it is back together, do not put the machine straight to heavy work. Start it at low idle so oil fills the joint and pushes air out. Jog both tracks back and forth to move oil through every layer. Watch the flange face and spindle for any weep. When oil is full and free of foam, drive the machine on flat ground. If both tracks run evenly and it tracks straight, the center joint seal job has passed. Run a few laps, then recheck the fittings one last time.
Quick reference: sign, cause, and fix
| Sign | Common cause | Direction to fix |
|---|---|---|
| Machine crabs to one side | Seals crossing layers in the joint | Replace the center joint seal kit |
| Oil weep under the belly | Outer seal or flange gasket worn | Replace seals and gasket, check flange |
| Both tracks weak when hot | Seals opening under heat | Replace seals, check oil grade |
| Still crabs after new seals | Deep spindle score left untreated | Recondition or replace the spindle |
| One track fully dead | May be the motor or valve | Check that travel motor |
This table only helps narrow things down. Still inspect in person before you conclude.
Why center joint seals wear early
Understanding the cause makes the next job last longer. Center joint seals wear fast usually because:
- Dirty oil, carrying sand and metal fines, scores the spindle and seals.
- Old, degraded oil no longer holds a good lubricating film.
- Running with over-hot oil for long spells hardens the seals.
- Water in the oil rusts the spindle and raises a ridge that cuts seals.
- Wrong seal direction or uneven torque from a previous job.
Most of these come down to one thing: keep the oil clean and cool. Clean oil is the cheapest way to extend the life of every seal in the machine.
Common mistakes when replacing the seal kit
Many jobs fail again because of familiar errors:
- Not inspecting the spindle, fitting new seals onto a ridged surface.
- Using a metal screwdriver that tears the seal lip on fitting.
- Fitting a seal lip the wrong way, so oil still crosses layers.
- Tightening the flange unevenly, under or over torque.
- Not marking the oil lines, swapping them so the machine runs backward.
- Skipping the air bleed, letting foam cause jumpy power mistaken for a leaking seal.
Avoid this group of errors and you fix it once, without opening the joint a second time.
Genuine, aftermarket, or salvage seals
The market has three groups: genuine seals, quality aftermarket seals from reputable seal makers, and used salvage seals off a scrapped machine. Genuine and quality aftermarket seals give steady sealing and life. Salvage may be cheap, but old seals have hardened and leak again soon. For a high-pressure, hard-to-open center joint, quality new seals are worth it, because the labor to open it is the costly part, not the kit price. Doing it once properly still beats opening the joint several times.
Maintenance to make the seals last
After the job, keeping the seals alive is a matter of daily upkeep:
- Change the hydraulic oil and filter on schedule by machine hours.
- Use the right viscosity grade for the climate, such as VG 46 or VG 68 per the recommendation.
- Keep the oil dry, and stop water getting into the tank.
- Do not run the machine long with over-hot oil.
- Act early at the first hint of crabbing, before wear goes deep.
Steady upkeep keeps the center joint seals sealing for longer, and protects the other hydraulic units too.
When to replace the whole joint instead of just seals?
A seal change is not always enough. If the spindle is deeply scored into a ridge, badly pitted, or the body grooves are corroded, a seal kit alone holds for only a few days. Then recondition the spindle or replace the whole center joint. Cost it by the real condition: if the spindle and body are still good, a seal kit is the cheapest route; if the surfaces are gone, chasing repeat seal jobs costs more than one joint. An experienced technician inspects the surfaces first, then decides, rather than swapping blindly.
How the center joint relates to other hydraulic faults
A crabbing machine sometimes comes with other hydraulic troubles worth checking together. A boom that drifts down under load points to cylinder seals; see the guide on cylinders drifting down. A wet rod with oil running down it is covered in rod oil leaks. These have a different root than the center joint, but share one rule: keep the oil clean and fit the right seals. While you have the center joint open, check the other seal groups so you clear them in one visit.
Cost and downtime
The costly part of a center joint seal job is the labor and the time the machine sits idle, not the kit price. The joint sits deep and needs many lines off, so it takes work. That is why it pays to do it once and do it right: inspect the surfaces, fit the full seal kit, torque to spec, and bleed carefully. Having all the parts ready before you strip it shortens downtime. Ordering the correct kit by model from the start avoids stripping it only to wait on parts.
When you need to replace the center joint seal kit or the right hydraulic seal parts for your joint, send your machine model and pump code to the Việt Trung Hải technical team to cross-check before ordering. For seal material and grades, you can also check maker references such as NOK to pick the right type for how your machine runs.
Key takeaways
- The center joint seals keep the oil layers apart; worn seals make the machine crab.
- Suspect the center joint only when travel alone is weak and off while digging and slewing stay strong.
- Inspect the spindle and body before fitting new seals so the repair holds.
- Match the seal kit to the machine model; there is no one-size-fits-all set.
- Fit seals the right way round, torque the flange to the maker spec, and bleed air before heavy work.
- Clean, cool oil is the cheapest way to extend the life of the center joint seals.
Written by
Trần Quốc Bảo
Trần Quốc Bảo works on hydraulic pumps and rotary groups at the Việt Trung Hải workshop. He measures pressure, overhauls and load-tests pumps across many excavator generations, and writes about pump principles, K3V rotary groups and fixing weak pumps from real cases.
Related parts
The exact parts discussed above — send your machine model or pump code to match.