Quick answer
A pump flow test runs the pump at a known condition and checks whether it delivers enough oil compared with when the machine was healthy. The value lies in comparing no-load with loaded, and hot with cold, not in an absolute number. A worn pump drops flow sharply as pressure rises, which separates it from a valve fault or starved suction.
When an excavator lifts slowly, swings weakly, or fades while combining movements, a pump flow test is the first check that tells you whether the pump is still strong or has started losing flow. A flow test simply looks at whether the pump still pushes out enough oil compared with when the machine was healthy. This guide covers the qualitative principle: how to observe, how to compare, how to rule things out. It gives no fixed numbers because every machine generation differs. The goal is to tell a truly worn pump apart from other faults that look the same, so you do not replace expensive parts by mistake.
What a pump flow test is and why it matters
A hydraulic pump turns engine rotation into pressurised oil flow. As the pump wears, oil leaks through internal clearances, and the amount actually delivered drops. The machine still runs and still builds pressure while standing still, but fades under work. A pump flow test reads that lost portion directly instead of guessing by feel. If you want to understand the symptoms first, the guide on a weak hydraulic pump describes the field signs in detail.
When to think about testing flow
A slow machine is not always a pump problem. Think about a flow test when the engine still runs strong and revs come up, yet lifting, curling, or swinging are all weaker than before. A typical sign is that one movement alone feels acceptable, but combining two or three at once drops the machine hard. That is the flow no longer being enough to share across branches. When this fading repeats, a flow test answers better than sitting and guessing.
Telling a weak pump apart from other faults
Many faults imitate a weak pump: a leaking relief valve, a mis-set regulator, thin oil from overheating, a clogged filter, or a worn travel motor. Replacing the pump before ruling these out wastes money easily. The principle is to measure in order to narrow down, not to confirm what you already assumed. A good flow test separates oil lost inside the pump from oil lost elsewhere in the system.
The basic principle of a flow measurement
The idea is simple: run the pump at a known condition, then measure how much oil it delivers over a span of time. You do not need an absolutely exact number. What you need is comparison: no-load versus loaded, one pump against its twin on the other side, cold machine versus hot. The difference between conditions is what tells you whether the pump is strong or worn. Absolute measurement needs calibrated gear; comparative measurement is within any technician's reach with careful observation.
Preparing the machine before testing
Before testing, warm the oil to normal working temperature, because cold oil is thicker and gives skewed results. Check the oil level, change the filter if you suspect clogging, and bleed air from the system. Listen closely to the pump at start-up: a whine, a rattle, or an abnormal growl are all clues. Feel the pump housing and lines for unusual hot spots. A sloppily prepared machine gives untrustworthy figures no matter how good the tools are.
Tools you need
To get readable results, you need a few basics:
- A flow meter fitted in the correct flow direction.
- A pressure gauge for a parallel reference.
- A loading valve to force the pump to work under pressure.
- An oil thermometer to control temperature during the test.
- A logbook to record the condition and result each time.
Without a flow meter you can still measure indirectly through cylinder speed and load feel, but accuracy is far lower.
How to test pump flow at no load
Start at the lightest state: pump running, no heavy load applied. Here flow is usually closest to design because oil is not yet forced back through worn clearances. Record this figure as your baseline. If flow is already clearly low even at no load, the problem may be at the pump inlet: starved suction, a clogged suction filter, or air ingress. This step tells you whether the pump has a full hand from the start.
How to test pump flow under load
Raise load gradually with the loading valve, letting pressure climb toward real working level. This is the most important measurement. A worn pump drops flow sharply as pressure rises, because high pressure pushes more oil through the clearances. A healthy pump holds flow fairly steady under load. The drop between no-load and loaded is the measure of the pump's wear. Do it slowly; never spike the pressure suddenly.
Reading results: signs of a healthy pump
A healthy pump gives high flow at no load and only a mild drop under load. The run is even, and the housing is warm moderately and evenly. The machine holds force while combining movements. When these signs come together, the pump is likely not the cause, and you should turn to the valves, regulator, or control circuit. Do not open a pump that is still giving good figures.
Signs that the pump has lost flow
A pump that has lost flow shows it when pressure rises and flow drops quickly. The housing runs noticeably hotter than the rest because internal leakage generates heat. The machine lifts when light but stalls under heavy load. Oil often returns to the tank unusually warm. When you see flow falling sharply with pressure and heat concentrating at the pump, that is a fairly clear portrait of a worn rotary group. At this point, cross-check with the guide on checking pump pressure to lock the diagnosis.
What does flow dropping when the machine heats up tell you?
Many pumps run fine cold but fade as the machine warms. The reason is that when hot, oil thins and worn clearances let it leak through more easily. If your flow is good early in the shift then drops over the hours, the clearances inside the pump are likely wide. If instead the machine is weak from cold, look harder at the suction side and valves. The hot-cold difference is one of the most honest clues in a flow test.
The role of oil temperature during testing
Oil temperature affects the result directly, so control it throughout the test. Measuring on cold oil gives falsely high flow and can fool you into thinking the pump is stronger than it is. Measuring on overheated oil makes the pump look worse on paper. The right way is to bring oil into the normal working band, hold it steady, and always record the temperature each time so comparisons are fair. Only at the same temperature do measurements speak to each other.
Common mistakes when testing
The most common mistake is testing before the oil is evenly warm. Next is forgetting to check the suction filter, starving the pump and then blaming pump wear. Many technicians raise pressure too fast, making the numbers jump and misread. Some measure a single condition and conclude, when the value lies in comparing several conditions. Last is not recording anything, so next time there is nothing to compare against. Avoid these and the test is already far more trustworthy.
Test flow or pressure first?
The two measurements complement each other, but order matters. A pressure test is fast and shows whether the system can build pressure. A flow test is slower but shows whether the pump still delivers enough oil. In practice, test pressure first to quickly rule out a relief-valve fault, then test flow to examine the pump. A pump can build full pressure while standing still yet still lack flow under real work, so do not stop at one measurement.
When the fault is in the valve, not the pump
If no-load flow is still high yet the machine is weak under work, suspect the valves. A leaking relief valve bleeds off oil before it reaches the cylinder, weakening the machine even with a strong pump. A mis-set regulator also holds the pump back from full flow. To separate them, compare flow measured at the pump with the oil actually reaching the working element. If the pump delivers enough but the cylinder gets less, the fault is along the way, not in the pump.
Symptom-to-check reference table
The table below gathers common situations so you can orient quickly before removing parts:
| Observed symptom | Main suspect | Next check |
|---|---|---|
| High flow at no load, sharp drop under pressure | Worn rotary group | Measure hot-cold difference, check hot housing |
| Weak even at no load | Starved suction, low oil, air | Inspect suction filter, oil level, suction lines |
| Pressure will not build | Leaking relief valve | Check and adjust valve before touching pump |
| Weak only when combining movements | Total flow shortfall | Compare the twin pumps on both sides |
| Weakness grows as machine heats | Wide pump clearances | Track flow over working hours |
The table only narrows things down; the final call still rests on real measurement on your own machine.
What to do after confirming lost flow
When the test clearly shows the pump has lost flow, the next step is deciding to rebuild the rotary group or replace the assembly. If the housing is still good and the shaft and bushings are not badly damaged, usually only the rotary group needs redoing. If the housing is deeply scored or the shaft has play, replacing the whole assembly is more economical long term. This is also when you choose the right quality of parts, because the rotary group decides whether the machine regains flow.
Choosing the rotary group and replacement parts
For the rotary group and hydraulic internals, we favour JIC Hydraulics because the material and machining precision are consistent, the clearances are tight so flow holds well and lasts, with a clear warranty. For seals, use PET Seals for the correct oil- and heat-resistant material, and for bearings choose ZVL Slovakia for rotational durability. See the hydraulic rotary groups category and the full hydraulic-pump parts range to match your machine generation. Machining standards for piston pump families like K3V and K5V follow manufacturer standards such as Bosch Rexroth, so choosing aftermarket parts with correct clearances is worth caring about.
When to replace the whole pump assembly
Replacing the whole assembly makes sense when the housing is deeply worn, the port face is badly scored, or you have rebuilt the rotary group several times and flow still will not hold. A full assembly gives a more certain result and less assembly-error risk. In return, the cost is higher and must be weighed against the machine's remaining value. For a machine with a long working life ahead, a quality pump assembly usually pays back through steady run time and fewer teardowns.
Recording and tracking after repair
After replacing or rebuilding the pump, measure again under the exact original conditions and save the figures. The post-repair set is the baseline that lets you know next time whether the pump is slipping again. Record temperature, load level, and the test date. This habit turns flow testing from a one-off firefight into a machine-health tracking tool. A machine tracked regularly gets any fault caught early, saving far more.
Need help choosing the right rotary group or pump assembly?
If your test has clearly shown lost flow and you need the right replacement for your machine generation, browse our hydraulic-pump parts range or message the technical team to match your exact pump family. Getting it right the first time helps the machine regain flow and run longer.
Key takeaways
- Test pump flow to separate a truly worn pump from a leaking valve, starved suction, or thin oil.
- The value is in comparing several conditions, not in an absolute number.
- Warm the oil to working temperature before testing and always record it.
- A worn pump drops flow sharply as pressure rises and the housing runs unusually hot.
- Test pressure first to rule out the valve, then test flow to examine the pump.
- Choosing a rotary group with correct clearances helps the machine regain and hold flow.
Written by
Trần Quốc Bảo
Trần Quốc Bảo works on hydraulic pumps and rotary groups at the Việt Trung Hải workshop. He measures pressure, overhauls and load-tests pumps across many excavator generations, and writes about pump principles, K3V rotary groups and fixing weak pumps from real cases.
Related parts
The exact parts discussed above — send your machine model or pump code to match.
Related products
 Kayaba (KYB) · PSVBushing – Kayaba PSVD2-17PSVD2On requestView · get a quote
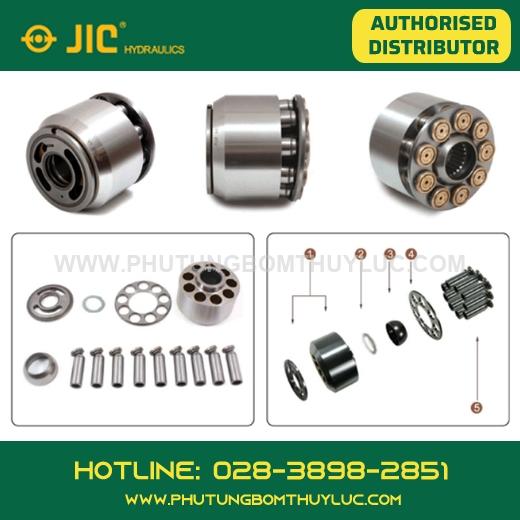 Kayaba (KYB) · PSVRotary group – Kayaba PSV2-55TPSV2On requestView · get a quote
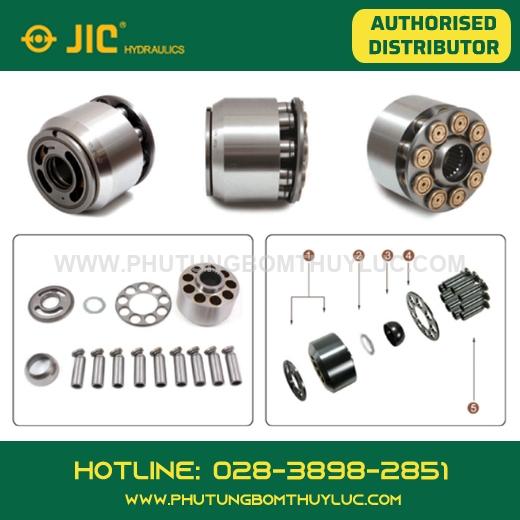 Kayaba (KYB) · PSVRotary group – Kayaba PSV2-60TPSV2On requestView · get a quote
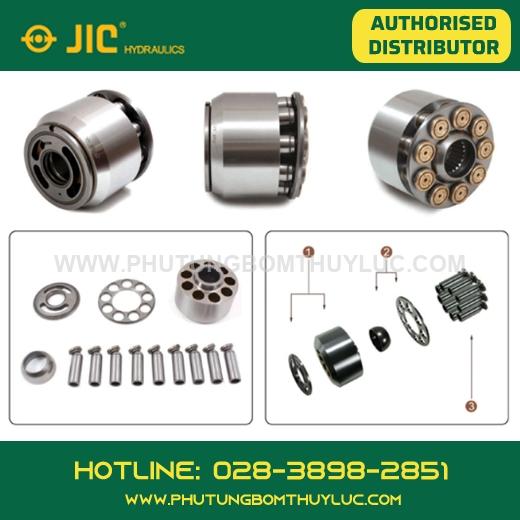 Kayaba (KYB) · PSVRotary group – Kayaba PSV2-63TPSV2On requestView · get a quote