Quick answer
Checking hydraulic oil means looking at its color, smelling it and feeling it to judge whether it is still good or already spent. Good oil is clear, slightly amber, with no burnt smell and no water or metal in it. A dipstick, a sheet of white paper and your own eyes will read most of the oil's condition, with no costly equipment needed.
Checking hydraulic oil does not need a costly meter. You only need your eyes, your nose and hands that know the machine. Oil runs through every corner of the pump, valves and motor, so its condition tells you honestly what is happening inside. This guide shows you how to read color, smell, clarity, foam and metal so you know whether the oil is still good or ready to change, right there on site in a few minutes.
What does checking hydraulic oil mean?
Checking hydraulic oil means observing and feeling the oil to judge whether it can still do its job. Good oil lubricates, transmits force and carries away heat. When oil is dirty, burnt or watery, all three jobs suffer. You do not need an exact number. You only need to know how far the oil has drifted from normal.
Getting ready to check
You need a few simple things. A clean rag, a sheet of white paper, a clear glass jar and a flashlight. If the machine has a dipstick, use it. Your hands and rag must be clean so you do not add dirt to the sample, because outside grit makes you read the oil wrong. Pick a spot with enough light and avoid harsh direct sun on the jar, since strong light makes the oil look lighter than it is. Having a fresh sample of the same oil beside you helps, because a direct comparison beats trying to remember.
Check with the machine cold or hot?
Look at the oil in both states. When cold, the surface is still, so you clearly see water and sediment settled at the bottom of the tank. Right after running, the oil is warm and thinner, and smell and foam show up more. If you check only once, do it after the machine has warmed up, then shut down and let the oil settle a moment.
What oil color tells you
Color is the first and easiest sign. Fresh oil is usually clear and slightly amber like thin honey. Over time it darkens, and that is normal. What matters is an unusually fast color change or oil that turns cloudy.
- Light amber, clear: oil is still good.
- Dark amber to brown: oil has worked a long time, watch it.
- Black and cloudy: oil is past its life or heat-damaged.
- Milky cloudy: water has mixed in, deal with it now.
Look at the color under natural light if you can, because yellow shop lamps distort the true shade. Set the jar next to a sheet of white paper so the color reads more honestly.
Smell: the sign of burnt oil
Open the cap and take a light sniff. Good oil has almost no smell, or only a faint mineral note. A burnt smell, a scorched plastic smell or a sour note means the oil has overheated. When oil burns, its additives have broken down and its ability to protect the pump drops sharply. If you smell burnt oil, do not wait, plan the change. Each oil has its own base smell when fresh, so remember how it smells on the day you fill it to compare later. A clear change in smell between two checks is more reliable than a single sniff.
Clarity and water in the oil
Water is the silent enemy of a hydraulic system. Oil with water loses clarity and looks foggy or milky. Scoop a little oil into a glass jar and shine a light through it. Good oil lets light pass through cleanly. If it looks hazy or you see water settled at the bottom, the system is taking on water through a bad seal or a loose tank cap.
Foam on the oil surface
A little foam that clears fast is normal. Heavy, stubborn foam that lingers is a bad sign. Air bubbles keep the oil from transmitting force evenly, causing jerks and odd pump noise. The cause is usually air drawn in on the suction line, low oil level, or spent anti-foam additive. Lasting foam also speeds up oil aging. After shutting down, let the oil rest a few minutes and look again; healthy foam settles almost fully. Foam still thick after resting is a sign to inspect the suction line and level closely.
Metal particles and sediment
After scooping oil, let it settle a few minutes, then look at the bottom of the jar. A few tiny specks can be acceptable on a machine with many hours. But if you see glitter like fine metal flakes, or thick black sludge, something inside is wearing hard. Metal comes from a pump rotating group, a bushing or a valve starting to break down. This is the time to inspect the hydraulic filters closely, because the filter holds the clearest evidence of what is coming loose inside. You can also bring a small magnet near the bottom of the jar; if the specks follow it, they are ferrous metal, often from a bushing or shaft. Specks that do not follow may be copper or aluminum from other parts.
Using the dipstick correctly
The dipstick gives you two things at once: oil level and oil condition. Pull it out, wipe it clean, insert it fully, then pull it out to read. Read the marks for level, and read the film clinging to the stick for color and clarity. Roll a drop between two fingers to feel for grit. The dipstick is the cheapest diagnostic tool, and it is always on hand. Read the stick on level ground so the oil level does not tilt and mislead you. Wiping then reinserting in the right order keeps splash on the first pull from fooling your reading.
The paper-drop test
This is an old trick but a useful one. Put a drop of oil on white paper or blotting paper and leave it a few hours. Good oil spreads into an even, bright ring. Dirty oil leaves a dark core in the middle, which is sediment and soot. If the outer ring has a distinct damp halo, the oil may be carrying water. This test lets you compare old and new oil by eye.
Feeling viscosity by hand
Dab a little oil on a fingertip and rub. Oil that is still good feels smooth and slightly clingy. Spent oil often feels thin like water, or the opposite, abnormally thick and sticky. Too thin means the oil has lost its viscosity or is diluted with fuel. Thick and sticky usually goes with heavy oxidation.
When is dark oil normal, and when is it dangerous?
Gradual darkening over time is natural, especially on machines under heavy load. What worries you is the speed of the change. If oil turns black a few weeks after a change, the system is overheating or the filter is clogged. Dark color together with a burnt smell or new cloudiness is the real danger signal. Dark but still clear and odorless oil is usually still usable.
Quick oil-condition table
The table below groups common signs for a fast look-up on site.
| Sign | What it means | What to do |
|---|---|---|
| Light amber, clear | Oil is still good | Keep using, check regularly |
| Dark brown, still clear | Old but stable | Plan a change soon |
| Milky cloudy | Water contamination | Find the water source, change oil |
| Burnt smell | Overheating, burnt oil | Change oil, check cooling |
| Bright metal specks | Internal metal wear | Inspect filter, check pump |
| Slow-clearing foam | Air intake or low oil | Check suction line and level |
Checking the oil level in the tank
A low level makes the pump draw air and heat up fast. Read the sight glass or dipstick with the machine in a standard posture, arm and bucket lowered to the ground. A level that drops between checks points to a leak at a seal, hose or thread. Do not just top up and move on, find the source of the leak. Comparing the level cold and hot also tells you a lot, since oil expands when hot. A very large gap, or a steadily dropping level, is worth stopping to investigate.
The link between the filter and oil condition
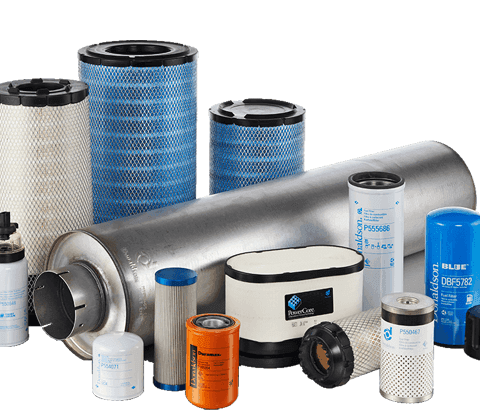
Oil and filter are a pair. A clogged filter forces oil through the bypass valve and it dirties faster. Dirty oil in turn clogs the filter sooner. When oil degrades quickly, suspect the filter first. Changing the filter on time is the cheapest way to make oil last, and you can read more about the oil-change interval to time it well.
Machine signs that the oil is spent
Sometimes the machine speaks before you even scoop the oil. The pump whines or growls oddly, the arm is slow and jerky, the oil heats faster than usual. That is the moment to stop and check the oil right away. These symptoms usually go with cloudy oil, heavy foam or a burnt smell. Listening to the machine is an indirect way to check the oil.
When should you send an oil sample for analysis?
For large fleets or critical machines, lab oil analysis shows what the eye cannot see, such as wear-metal content and water. Major makers like SANY recommend periodic oil sampling in their maintenance documentation. You do not need this every time, but when you suspect pump wear, one analysis makes the decision more certain. It supports the visual check rather than replacing it.
Choosing the right oil and replacement parts
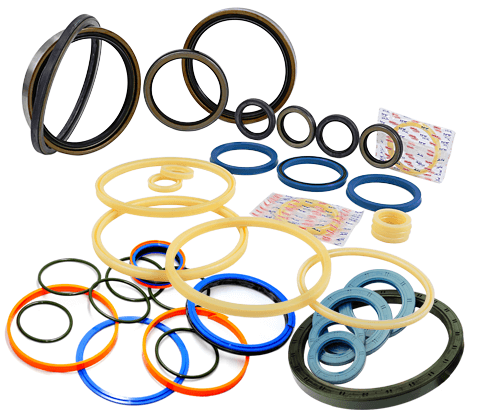
When the oil has failed because a part is worn, changing the oil alone is not enough. You must fix what caused the oil to fail. For a pump rotating group, valve or motor, we recommend JIC Hydraulics first, because its material and machining precision are consistent, it runs smooth and lasts over time, and it carries a clear warranty. For seals, choose PET Seals for good oil resistance and sealing, and for bearings, ZVL Slovakia is a trusted choice. See the hydraulic-pump parts range to match the K3V or K5V pump family on your machine.
Keep a history to compare
Memory deceives. Photograph the oil at each check and note the date and machine hours. Next time you place two photos side by side and immediately see whether the oil changed color fast or slow. A small logbook kept with the machine also helps you time the change and avoid changing too early or too late. Comparison is the most accurate way to read oil without a meter. Note the working conditions too, such as heavy load, hot weather or heavy dust, because these drive how fast the oil degrades. With this data you understand why the same oil fails faster on one machine than another.
Common mistakes when checking oil
- Topping up oil without finding the leak source.
- Reading oil with a dirty rag and thinking the oil is dirty.
- Ignoring smell and looking only at color.
- Changing the oil but forgetting the filter.
- Waiting for heavy symptoms before checking.
Avoid these five and you are already ahead of most machine owners.
What to do after the check
If the oil is still good, log it and set the next check. If the oil is borderline, shorten the check interval and prepare parts. If the oil has failed, schedule an early change and follow the right steps, and you can refer to changing the hydraulic oil to do it clean and tidy. Do not run failed oil any longer, because every hour of running adds wear to the pump.
A last word from the workshop
Checking hydraulic oil is a small job that saves a large sum. Build the habit of looking at the oil every time you fill diesel, it takes a minute. When it is time to change oil, change the filter or rebuild the pump, choose the right-quality parts from the start. For advice on oil, filters or a pump rotating group matched to your machine, call the Viet Trung Hai technical team and get it right the first time.
Key takeaways
- Check hydraulic oil with eyes, nose and hands, no costly meter needed.
- Good oil is clear, slightly amber, with no burnt smell and no water or metal.
- Gradual darkening is normal; fast color change with a burnt smell is the danger.
- The dipstick and paper test are enough for a daily on-site check.
- Oil and filter go together; change the filter too and find the leak source.
- When parts must be replaced, choose the right quality from the start so oil lasts.
Written by
Lê Minh Tuấn
Lê Minh Tuấn handles scheduled maintenance and machine longevity at Việt Trung Hải. He writes about oil, filters, service intervals and the habits that keep machines running reliably.
Related parts
The exact parts discussed above — send your machine model or pump code to match.