Quick answer
Adjusting hydraulic pump pressure correctly means measuring first, adjusting in small steps, and matching the maker's spec for the model. On an excavator you separate main, pilot and cut-off pressure, then correct only the one that is off. If the pressure will not rise or fades when hot, the fault is a worn rotary group, not the adjusting screw.
Adjusting hydraulic pump pressure the right way takes an understanding of the system, not just turning a screw to make the machine feel stronger. On an excavator, the relief valve limits pressure while the regulator manages flow and power. A small wrong move overloads the pump, swells a hose, or stalls the engine. This guide moves from the pressures you must tell apart, to tools, to measuring and adjusting step by step, to the point where adjusting is useless because the pump is worn — so you get it right the first time and spend nothing in vain.
What does adjusting hydraulic pump pressure actually mean?
Many mechanics think adjusting pressure is one single screw. The phrase actually covers several jobs. You can adjust the main relief valve, the cut-off pressure, the pilot control pressure, or the flow at the regulator. Each one changes the machine in its own way. Before you pick up a wrench, decide exactly which one you mean and why. If the machine is weak because the hydraulic pump is worn, adjusting pressure only hides the symptom for a few days, then it gets worse.
The pressures on an excavator you must tell apart
An excavator hydraulic system has several pressure levels, not one number. Confuse them and you adjust the wrong thing.
- Main pressure: the maximum working pressure limited by the main relief valve.
- Pilot pressure: the small control pressure that opens valves and drives the regulator.
- Standby pressure: the waiting pressure when controls are centred.
- Cut-off pressure: the level where the pump reduces flow to avoid overload.
- Port relief: the separate limit for each cylinder.
Each level has its own test port and its own way to adjust. Lumping them together is the root of most botched jobs on site.
Tools and conditions you need before adjusting
Adjusting without a gauge is only guessing. Get everything ready first.
- A gauge of the correct range with fittings that match the machine's test ports.
- Adapters and hoses rated for high pressure.
- Reference data for the exact machine model and pump code.
- Oil warmed to operating temperature.
The most important condition is warm, clean oil. Reading cold oil gives false numbers. If the oil is dirty or low, fix the oil supply first — do not adjust on top of a system that is already faulty.
When should you adjust pressure, and when must you fix the pump?
This question separates the cheap job from the costly one. Adjusting is only right when the mechanical side is sound but the pressure has drifted off spec.
Adjusting makes sense when the machine has just been repaired and needs setting, when someone set it wrong before, or when the reading is slightly off the maker's spec for the model. On the other hand, if the pressure will not rise at full screw, or rises then fades under load, the problem is the rotary group or a valve, not the adjusting screw. Adjusting further only harms the pump faster.
What the main relief valve does
The main relief valve is the pressure backstop for the whole system. It dumps oil when pressure hits the limit, protecting the pump, hoses and cylinders from bursting. The main pressure figure must match the maker's spec for the model, no higher.
Many people raise this valve to dig harder. That is dangerous. The pump, hoses and seals are built for a set pressure. Above it, service life drops fast and the risk of a burst hose climbs. Keep the relief valve on spec — it is not a power knob.
The pump regulator and how it manages flow
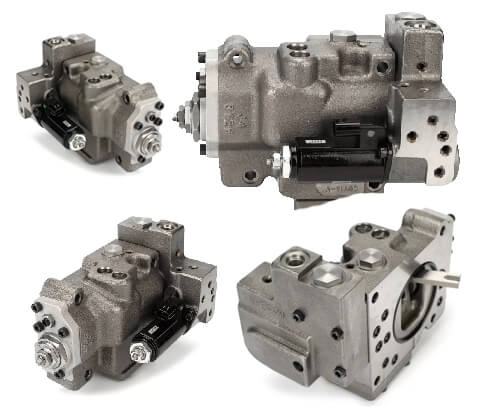
On an axial piston pump, the pump regulators set the swash plate angle, which is flow and power. It is the most delicate control on the pump. It reads pilot and cut-off pressure to raise or lower the oil it delivers.
Under heavy load, the regulator lowers the angle to keep power within engine limits. Under light load, it opens the angle for speed. Adjusting the regulator resets the relationship between pressure and flow, which needs accurate measurement and an understanding of each pump's control type. Turning this group blindly can leave a machine both weak and hot.
How pilot and control pressure affect the machine
Pilot pressure is a small control flow that governs the whole system. It opens the main valves, commands the regulator, and sets how sharply the controls respond. Low pilot pressure makes the machine react slowly and the controls feel sluggish, even when the main pump is fine.
Before blaming the main pump, measure pilot pressure. Many sluggish machines have a worn pilot pump or a drifted pilot reducing valve, not a bad main pump. Pilot pressure also needs to match the maker's spec for the model. A wrong pilot setting throws off the regulator's behaviour too.
What cut-off pressure and power shift are
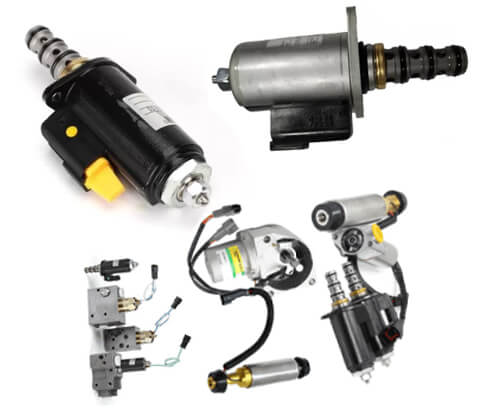
Cut-off is the level where the pump cuts its own flow so it will not stall the engine. On many pumps, an electric proportional valve shifts the cut-off point with engine load, called power shift. It lets the pump and engine share load sensibly.
Set the cut-off too low and the machine goes weak early and drops force in hard digging. Set it too high and the engine gets dragged down, blows black smoke and stalls easily. Adjusting cut-off is finding the right balance for the pump-and-engine pair, per the maker's spec for the model.
A step-by-step way to adjust hydraulic pump pressure
A set routine keeps you from skipping a step or adjusting in the wrong order. Follow these steps:
- Warm the oil to operating temperature and check its level and cleanliness.
- Look up the maker's pressure spec for the exact model and pump code.
- Fit the gauge to the correct test port for the pressure you are checking.
- Measure and record the current value before you turn anything.
- Compare with the spec and note how far off it is and in which direction.
- Turn a little at a time, measuring again after each change.
- Lock it, seal it, and record the final value.
The rule throughout is measure first, adjust second, and adjust in small steps.
How to measure main pressure correctly
Measuring main pressure needs load so the pump reaches its top figure. The common way is to hold a cylinder at the end of its stroke, then push further so the relief valve opens. Read the number once it settles, not while the needle jumps.
Read it several times, both when the oil is just warm and when it is fully hot. If it reaches spec warm but fades hot, that points to internal leakage in the pump, not a relief valve fault. Record each reading to compare. Measuring right matters more than turning, because a wrong number leads to a wrong adjustment.
How to adjust the main relief valve safely
Only after measuring and confirming the mechanics are sound do you adjust the relief valve. Loosen the lock nut, turn the adjusting screw a little, one small step at a time, then measure again. Do not turn several turns at once.
Set it to the maker's spec for the model, not higher for power. When you reach the right number, hold the screw and tighten the lock nut without letting the screw rotate. Measure one last time after tightening, because the lock nut can shift it slightly. Seal it again if the maker requires.
How to adjust cut-off and set regulator flow
Cut-off and regulator adjustment is the hardest part, best done once you know the pump's control type. Each pump has its own screws or shims for flow and for the cut-off point.
Set the cut-off so the pump drops flow just as the engine starts to labour, neither too early nor too late. Set the flow so the machine is fast enough without dragging engine speed down. This needs pressure and engine RPM measured together. Without the data and the right gauges, take the pump to the workshop rather than guessing on-site.
Quick-reference table of symptom and what to adjust
The table below helps you narrow the field before you pick up a wrench. It is general guidance; always check the maker's spec for the model.
| Symptom | Suspect first | What to do |
|---|---|---|
| Weak on every function | Main pressure or pump | Measure main pressure under load |
| Fades as oil heats | Internal pump leakage | Measure hot, consider overhaul |
| Sluggish, slow response | Low pilot pressure | Measure pilot first |
| Stalls in hard digging | Cut-off too high | Lower cut-off to spec |
| Only one function weak | Valve or port relief | Check that function's valve |
The table only points the way. Exact numbers always come from the maker's data.
Common mistakes when adjusting pressure
Most damage during adjustment comes from a few repeated habits. Avoid them and you are halfway there.
- Adjusting while the oil is still cold, which gives false numbers.
- Turning several turns before measuring.
- Raising pressure for power instead of finding the cause of weakness.
- Skipping the pilot reading and blaming the main pump.
- Not recording the original value before turning.
- Adjusting on dirty or low oil.
Each of these leads to a machine that runs wrong or a pump that fails early. The discipline of measure-first, small-steps, write-it-down is the guard.
Why you should not raise pressure for more force
Raising the relief valve gives an instant feeling of a stronger machine. The bill afterwards is steep. The pump, hoses, seals and cylinders all have a design pressure limit.
Above spec, the rotary group wears fast, hoses swell and burst, and seals leak early. The engine is dragged harder, burns more fuel and runs hot. The extra force is not worth the failures. A machine losing power needs a correct diagnosis at the root, not pressure forced past spec.
Adjusting on genuine, replacement and used pumps
Not every pump reacts the same to adjustment. A sound genuine pump usually sets to spec easily. Good replacement parts set well too, but sometimes the tolerances differ a little, so measure more carefully.
Used pumps are unpredictable. A worn used pump may not hold pressure even at full screw. For these, fitting the correct hydraulic rotary groups or regulator by code usually lasts longer than forcing an adjustment. Choosing the right hydraulic-pump parts by pump code is the foundation of a successful setting.
When adjusting no longer works: the rotary group is worn
There is a point where every adjustment is useless. That is when the rotary group is worn past its limit. The clearest sign is full screw and the pressure will not rise, or it rises cold then fades fast when hot.
By then oil slips through the internal clearances faster than the pump can make up. Adjusting cannot rebuild the mechanical sealing that is gone. For common pumps, see more on the K3V rotary group to know when an overhaul is due. Forcing more adjustment only heats the pump and wears it faster.
Maintenance that keeps pressure stable
Stable pressure starts with clean oil. Dirty oil and a clogged filter make pressure swing and grind the pump. Keeping to the oil and filter change intervals is the cheapest way to stop pressure from drifting.
- Use the right oil grade, such as VG 46 or VG 68 per the recommendation and climate.
- Change filters on the machine-hour marks, often the 250, 500, 1000 and 2000-hour points.
- Check the suction line so air does not get in and foam the oil.
- Keep the oil cool and avoid long overheating.
A clean oil system holds the pressure figure longer between adjustments.
Recording and sealing after adjustment
Adjusting without a record loses the trail for next time. Write down the original value, the value after adjustment, the date, machine hours and who did it. This log lets the next service compare quickly.
If the maker requires the valve sealed after adjustment, do it properly. A seal shows who has been in and stops others turning it blindly. On rented machines or machines with many mechanics, the habit of recording and sealing avoids arguments and repeated stacked adjustments.
Match the exact pump code and model before adjusting
The correct pressure figure always belongs to the exact pump code and the exact model. The same machine family in a different year can carry a different pressure spec and a different control type. Adjusting to another machine's number is wrong from the start.
Before turning, read the pump tag, identify the code, and match the documentation for the right year. If unsure, stop and look it up — do not guess. One correct match saves hours of trial and error and spares the pump.
If you are unsure of the test port or the correct pressure figure for your machine, let Việt Trung Hải help. Send your machine model and pump code so we can match the exact spec and advise the right parts. You can also check the original technical data from the maker, such as Kawasaki, before you adjust.
Key takeaways
- Adjusting hydraulic pump pressure means measuring first, adjusting second, in small steps.
- Separate main, pilot and cut-off pressure before touching any screw.
- Always warm the oil to operating temperature before measuring and adjusting.
- Never raise the relief valve for power; the cost is early pump and hose failure.
- If pressure will not rise at full screw, the rotary group is worn and needs an overhaul.
- The correct pressure always belongs to the exact pump code and machine model.
Written by
Trần Quốc Bảo
Trần Quốc Bảo works on hydraulic pumps and rotary groups at the Việt Trung Hải workshop. He measures pressure, overhauls and load-tests pumps across many excavator generations, and writes about pump principles, K3V rotary groups and fixing weak pumps from real cases.
Related parts
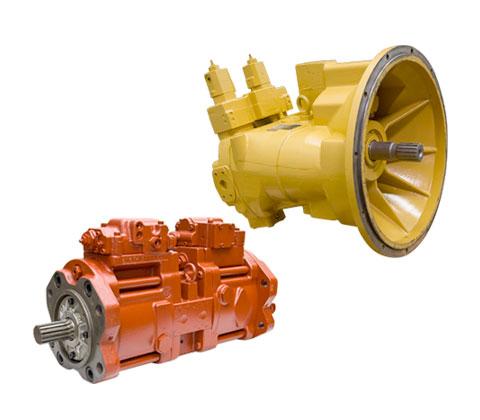
The exact parts discussed above — send your machine model or pump code to match.